Per our continued focus on new System Integrator (SI) features, this article will take a look at “updating” your project’s tax implications in SI. This feature now enables SI users to set up taxes for all client submissions via the Avalara integration.
This is yet another step forward in time-saving feature-sets we’ve recently added to SI that leave the work to “others”. This allows you to build out quotes and proposals while relying on Avalara to update the SI project. Since D-Tools have already issued videos, webinars, and our usual documentation for this feature, for today’s blog entry, we’ll focus on ease of set-up and utilization to get your team on the road to quicker quoting and accurate tax computations.
____________________________________________________________________________________
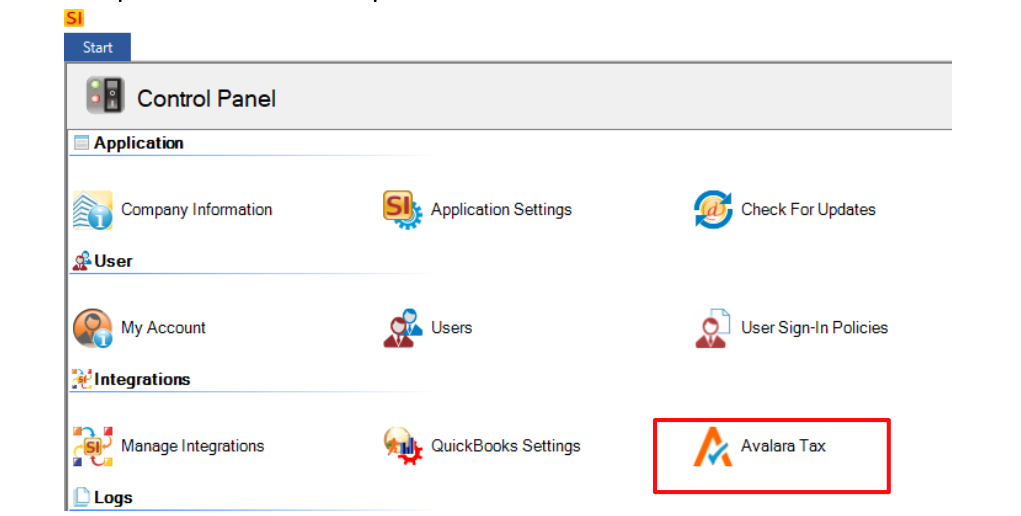
First things first, you will need to review your SI set-up and configuration in the Control Panel to ensure that your team has enabled the Avalara integration. To view this, you will need to have the appropriate user permissions and then proceed to the Avalara icon and “double-click” to launch the section.

From there, you will see this:
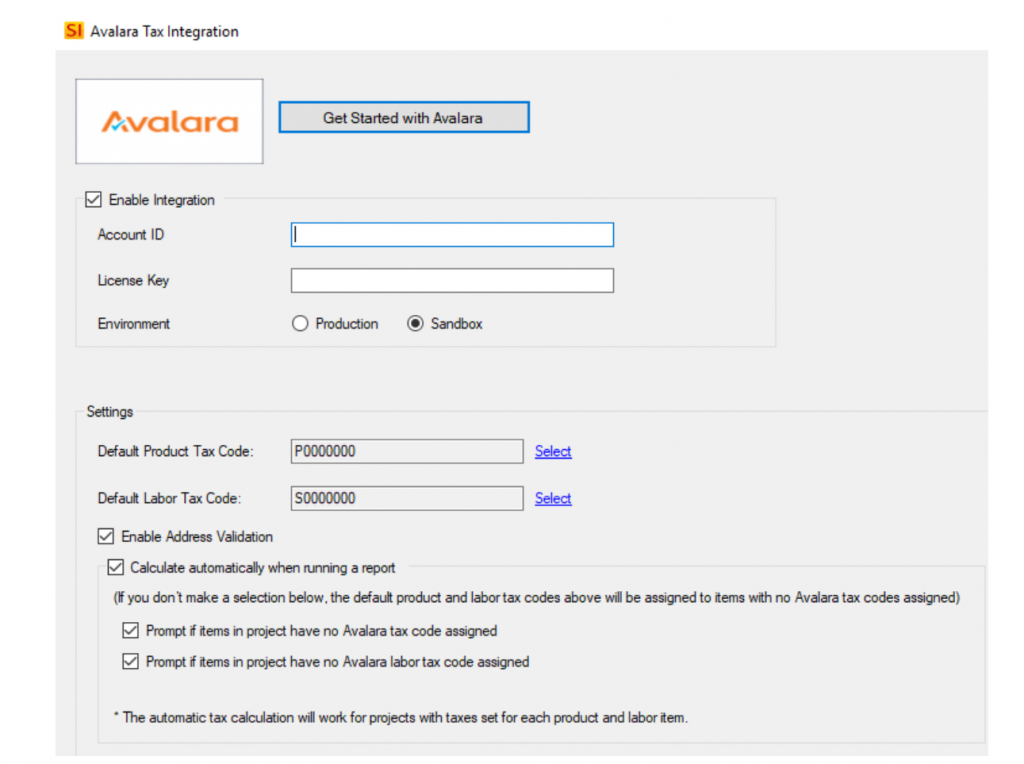
As long as there is an account number and corresponding license key, you’re all set. Otherwise, you’ll need to create an Avalara account by clicking on the “Get Started with Avalara” box. This will launch a web browser page taking you to Avalara’s home page.
Once you’ve got your account number and license key information entered, you’ll need to address your Default Product and Labor tax codes. There are some checkbox values that will need your attention as well. It is recommended to simply check all four to get started so that the mechanism will work as an “automated” feature and prompt your users accordingly. Don’t forget, you’ll need to select the appropriate “Environment” option: Production or Sandbox.

Keep in mind that no existing projects will be affected by this change in the Control Panel. Before we can see how it works at the Project level, we’ll need to take a look at the tax settings in the Catalog and the Client Explorer.
And let’s start there shall we…
The Client Explorer
This feature pertains to your clients that are, as a rule, tax exempt. You’ll want to go ahead and update these clients so there is no confusion once you create a project for them.

Simply select the appropriate designation for the client and “Save and Close”.
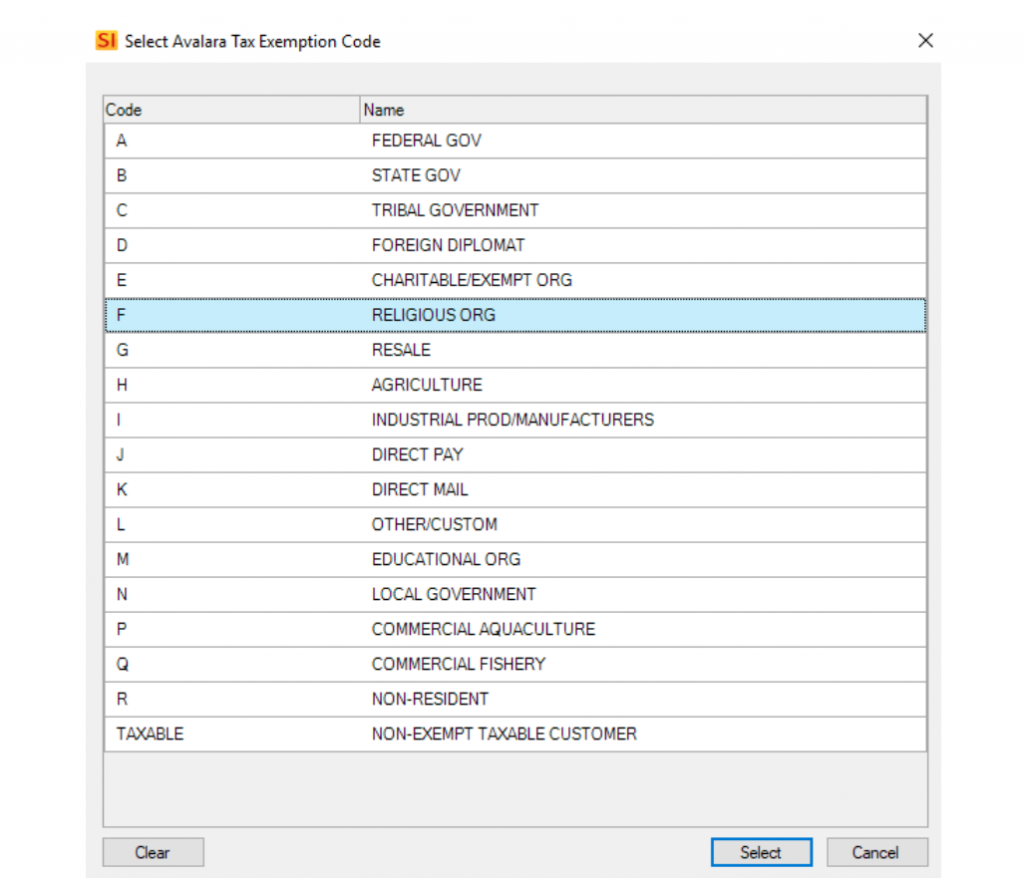
This then prepares their status for any newly created SI projects. Once you click “Select”, their client explorer status will be reflected as such:

The Catalog
Now this is the really important step in terms of prepping your products so that they are appropriately marked for their corresponding tax implications.

Note: This can also be performed as a mass-update allowing you to address potentially hundreds of items.
Since there are dozens upon dozens of product categories, you’ll definitely need to spend some time here to get these values adjusted accordingly.
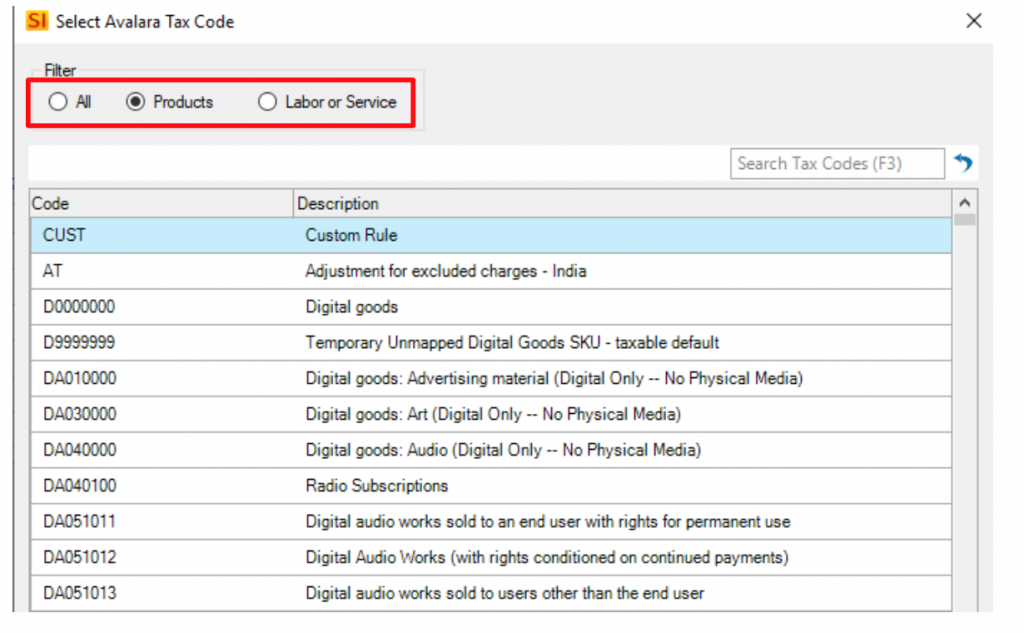
Just notice that when you do engage in this assignment, you have the option to segment products from labor/service values.
From here, we’re now ready to proceed to using the Avalara integration at the Project level. Keep in mind too that, when your product does not have an Avalara code set in the catalog, it will take on the code assignment from your default selection in the Control Panel configuration of the Avalara integration.
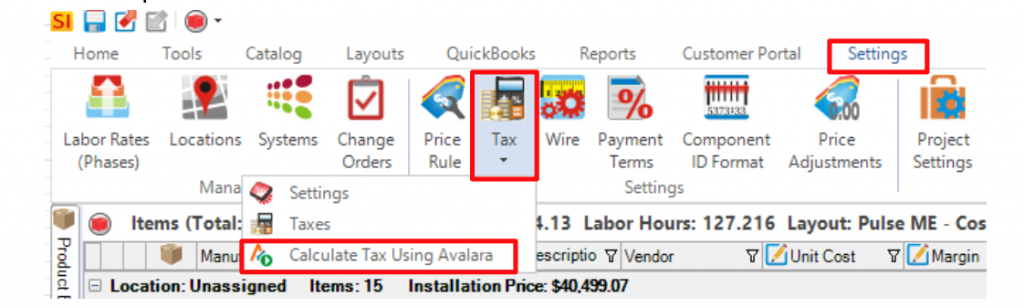
An SI Project
This is where the power of this integration can finally be realized. Once you’ve added catalog items to your bill of materials, select “calculate the values from Avalara” to see it in action. This is found on the Settings tab of the project icon ribbon. Just select “Tax” and then the last option that appears in the lower drop-down field:
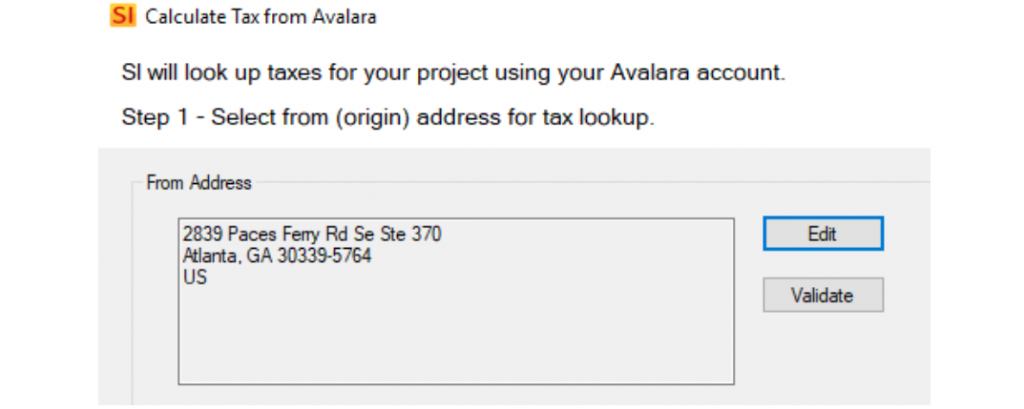
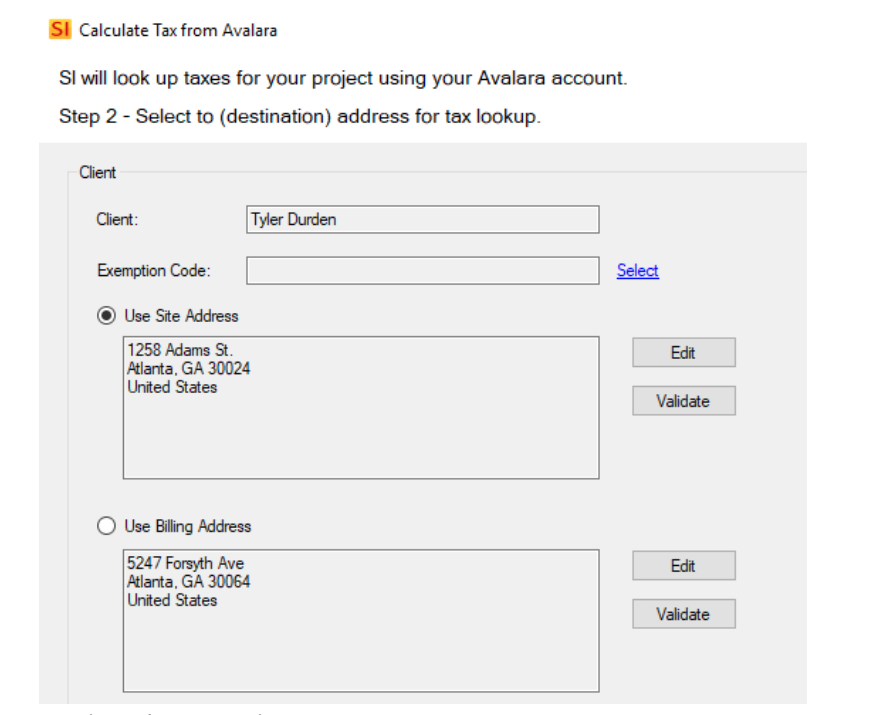
Then perform the following actions:
-Validate your project’s address-
-Select your preferred project address (site or billing)-
-Update the tax code-
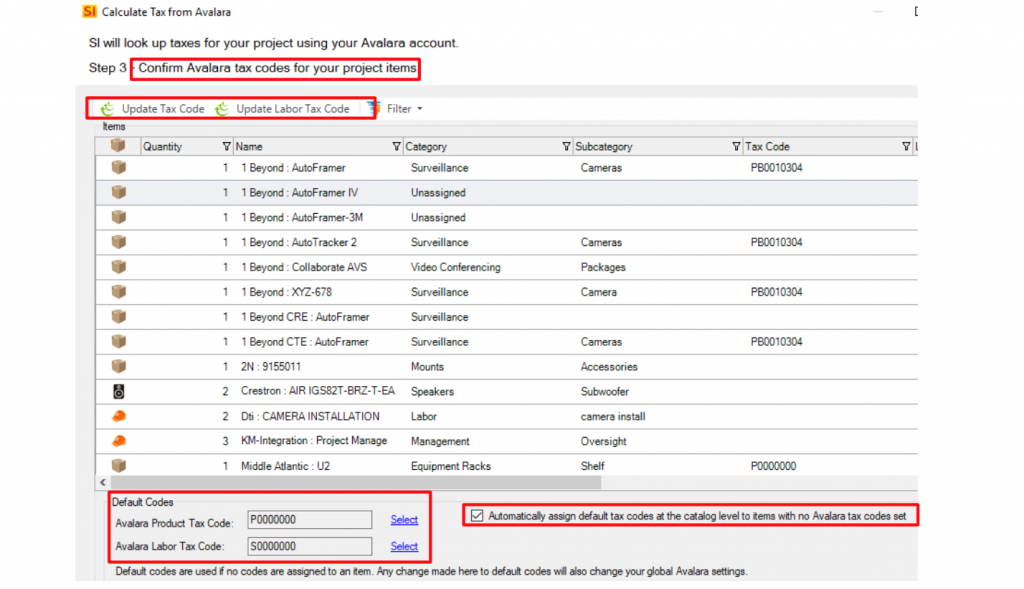
When the screen showcased in the photo above appears, you’ll have the ability to update individual items or update all items as well as updating the catalog default value. Just review the red outlined areas to ensure the appropriate values are enabled.
-Verify the amounts-
Next you can review, modify, and update the project’s tax amounts.
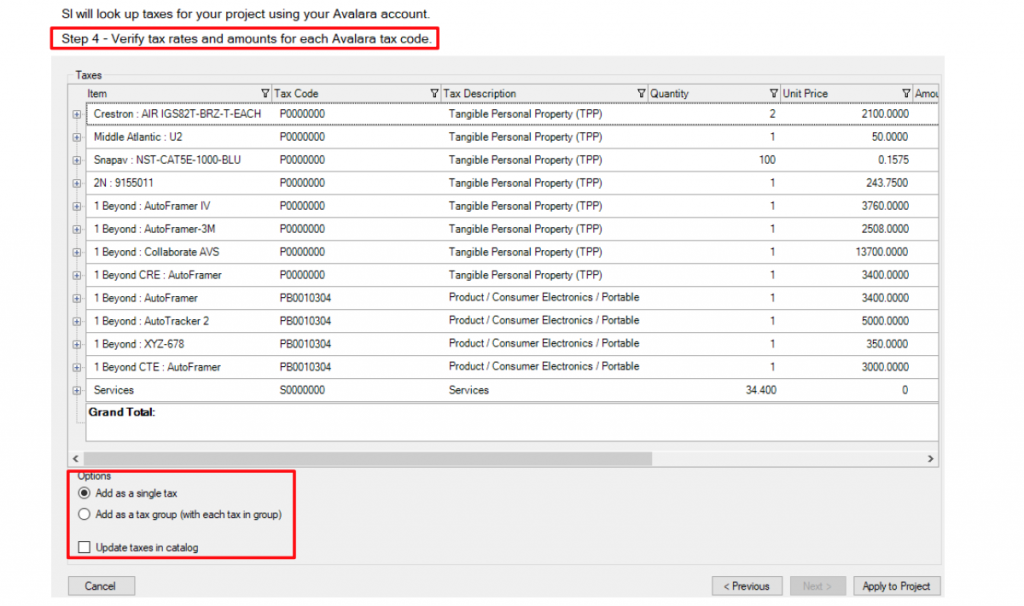
There are some areas here that cover how the tax is applied and an update to the catalog that can be selected.
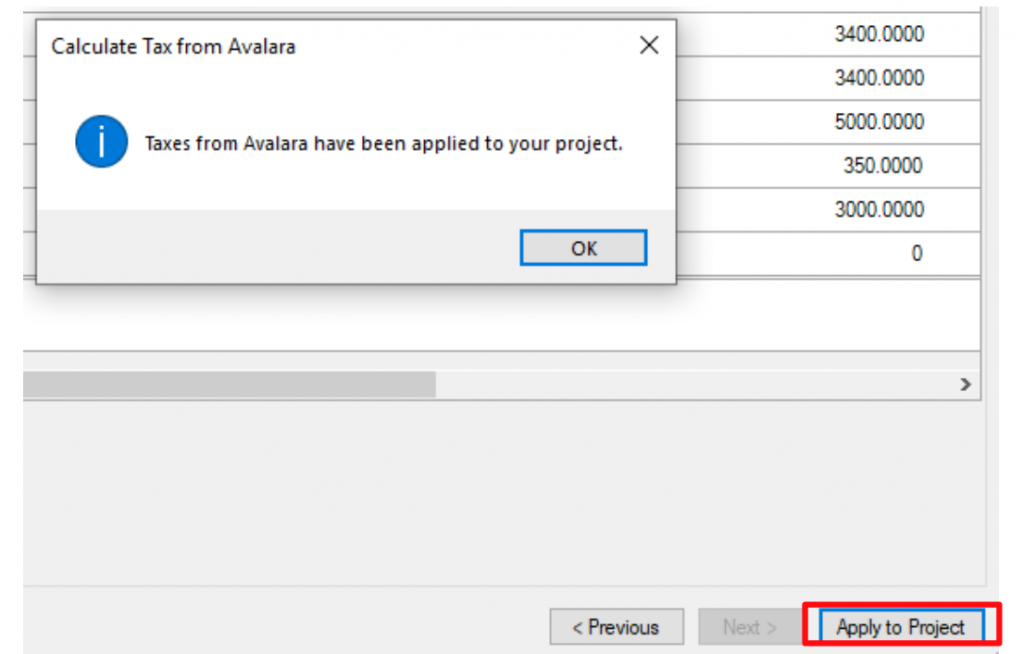
Once you’ve addressed these areas, click “Apply to Project” to complete the tax application via Avalara.
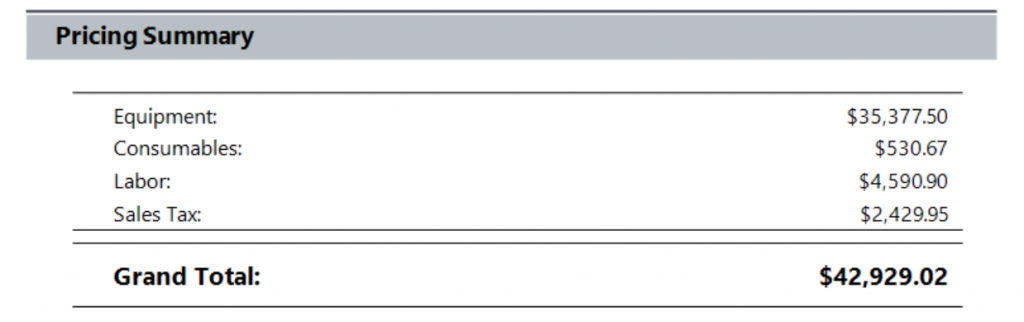
Now you can run any report that you typically would use in order to see the project-wide tax computation.
Prior to that, you can review the line item level details via a custom layout:

This can help you to see where values may be lacking and provides an opportunity to update those.
Now you’ve completed the set-up and utilization of an integration that does the work for you. Just remember, the key to the success of this integration is making sure your site and billing address for your clients and projects are up to date and accurate tax wise.
Hopefully this feature of SI will enable your team to save time and be more accurate when compounding your project totals “digitally”!
_____________________________________________________________________________________
In closing…
For more information on these and other features of the latest release of SI, please see this link: https://support.d-tools.com/
You can also get more detailed information about SI via our upcoming webinars or by enrolling in SI training with our PSG team.
And don’t forget, that’s why we’re here…to ensure your success with our product! Be sure to check back here next month for more on SI