Shape client expectations with your documents – make your first impression, a lasting one.
Recently I was “talking shop” with one of our dealers and it was mentioned that they would prefer that their proposal cover page have a little more flare so that it would stand out when presented to their clients. I was immediately reminded of a scenario I experienced as a dealer several years ago when I showed up to meet with a client.
After working so hard to cultivate the lead and design a solution specifically tailored for their needs, I was met with terrible discouragement upon gazing on the client’s desk only to see no less than three other quotes that were clearly generated in D-Tools. Now, while that says a lot about our software, it also speaks to the importance for our dealers to understand the basics about customizing their client presentations and related collateral appropriately.
So, how to start with this process? That could depend upon what exactly you’re trying to achieve with your intended outcome. Design can be a very challenging process and sometimes “less is more”. With this thought in mind, we’ll focus on some basic modifications beyond “Theme” adjustments that you can make in the SI 2018 “Report Designer”. To review the “Theme” section please see my prior blog on this subject: Report Theme Customization
So, without getting into the coding language of Visual Basic, let’s take a look at how to approach modification of your Cover Page in SI 2018:
The Report Designer
For those of you who have not ventured into this area of the software, I can’t say that I blame you. It can be very confusing for those of you who have not worked in the Designer before on prior reports. (This is why D-Tools offers Report Customization via our PSG and support team. Just check with your CSM representative for more information on that.) I myself stayed away from the Designer until I had been using the software for a number of years choosing to instead tackle my report customization via Word or Adobe as all SI reports can be exported to an “RTF” file designation.
While overall coding and structural elements may require assistance from us, small, graphic changes and enhancements can be easily achieved. Placement and adjustments of existing elements already present in the various reports, can also be tackled in a straightforward manner as if working in other design software.
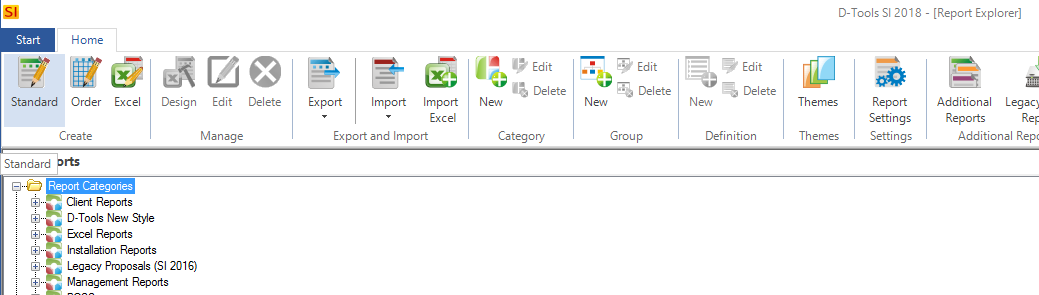
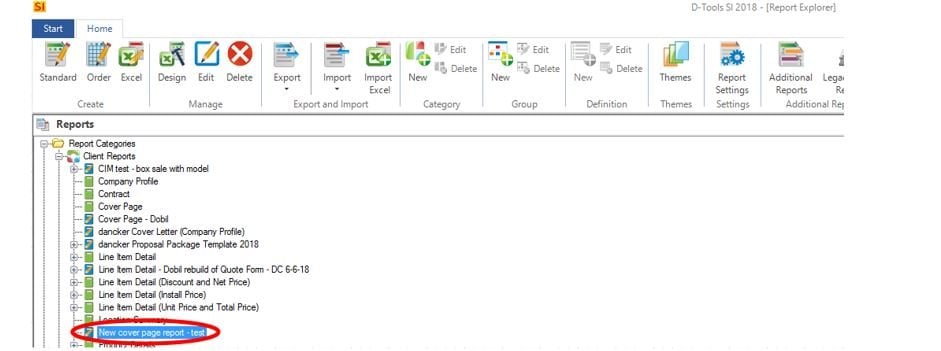
First step, navigate to the Home Page of SI 2018 and select “Reports” in the “Projects” section:

From here, you will enter the “Report Explorer”:

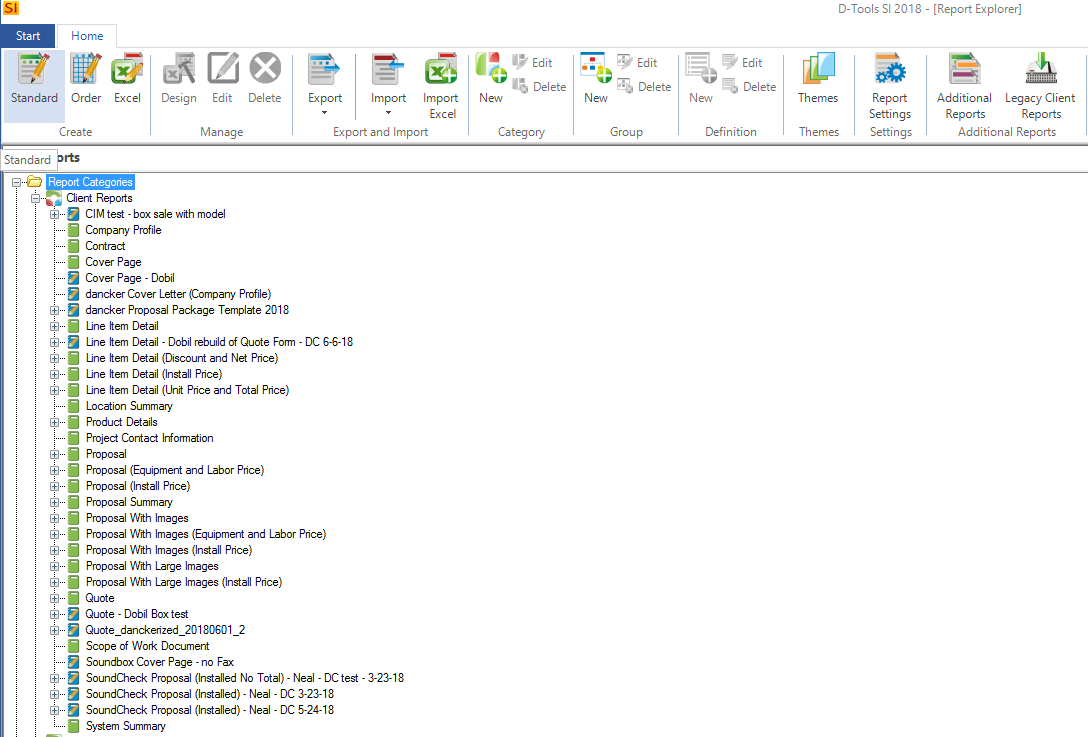
Simply expand the “Report Categories” section to review the list of existing reports:
Expand the “Client Reports” section to reveal your client-facing documents:
Now, let’s get the Report Designer open and start work. Simply click on the “Standard” icon in
the top left section of the “Report Explorer”:

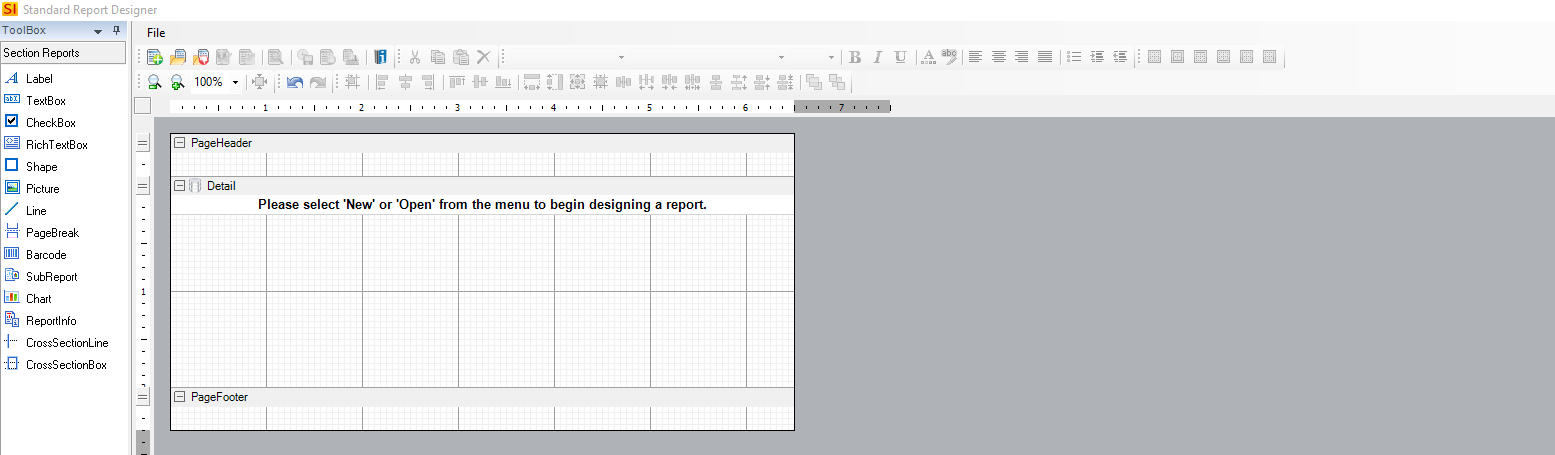
The Report Designer will open and you will next see this screen:
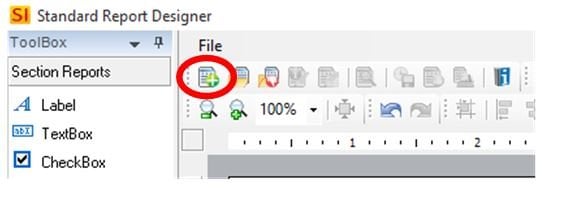
To modify your Cover Page report, select the “New” icon in the top row of graphics just below
the “File” designation:
You will then see this:

The New Report Wizard opens with two options. Select the top, defaulted option “New Report
Based on Existing Report”. Do not select “New Blank Report”.
The next screen will populate a list of reports:
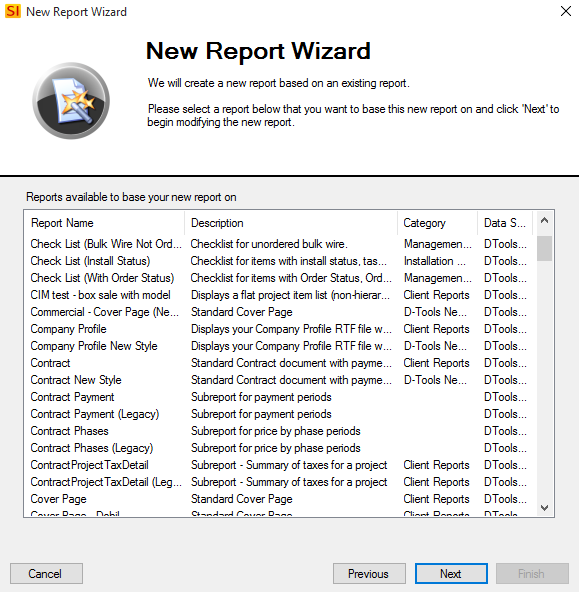
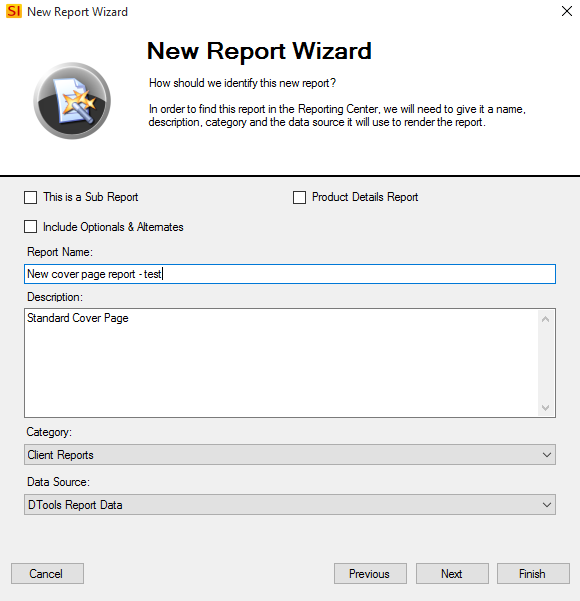
Select “Cover Page” from the list and click “Next”. From here you will need to name the new
report. (Perhaps something with “test” in the title until it is ready to publish.)
Now you can simply press “Finish” in the bottom right corner to launch the existing cover page
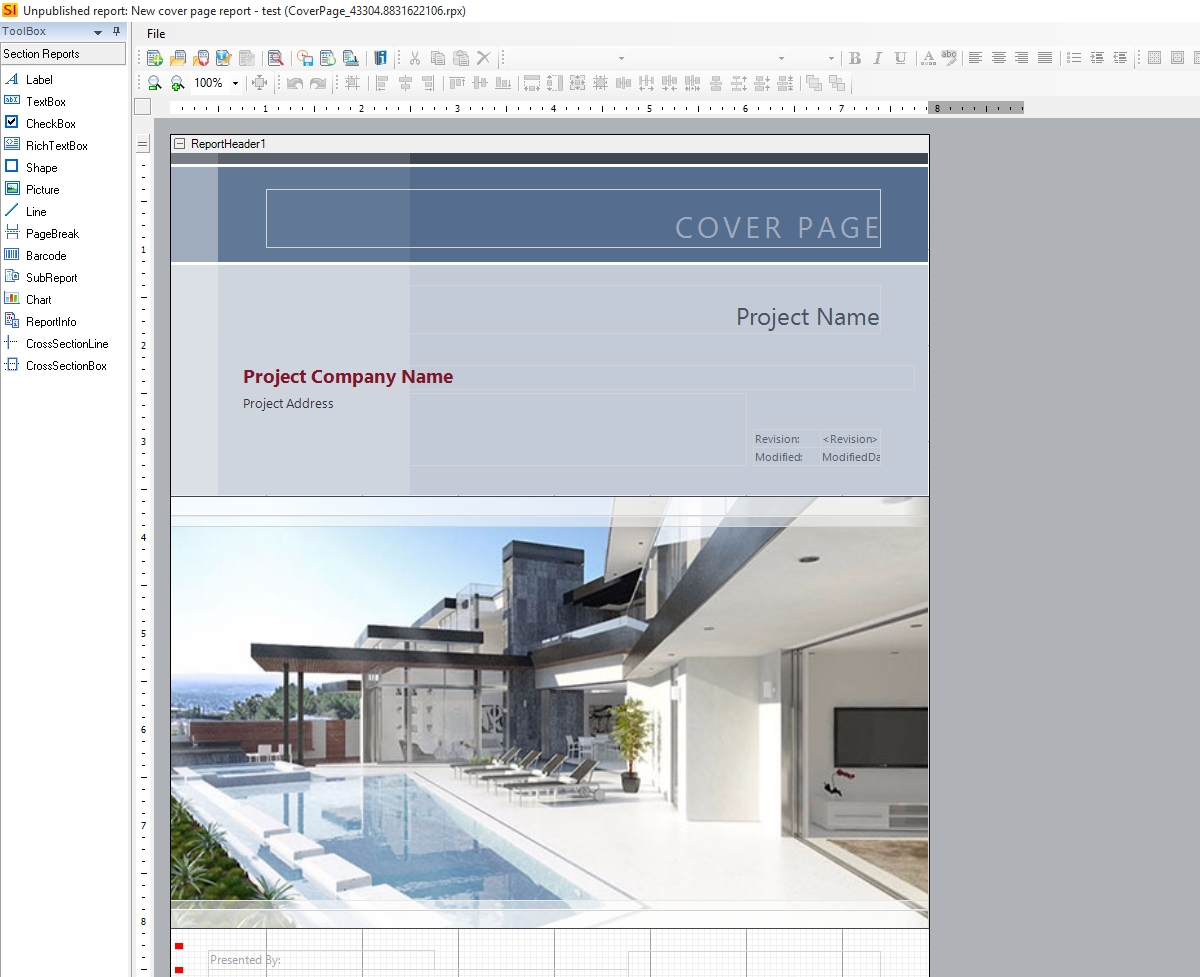
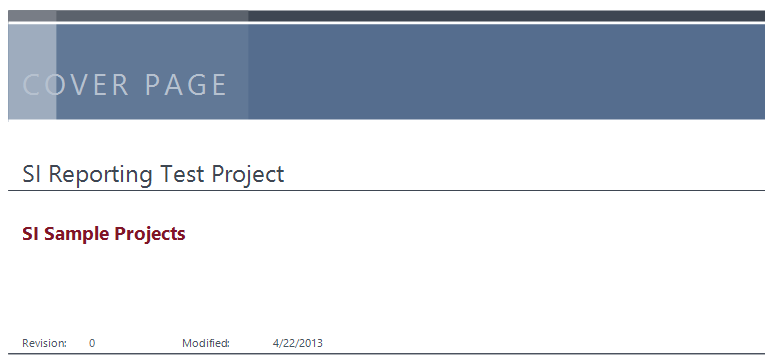
report in the Report Designer for modification. The result will be this:
Important note before you begin customizing your document, some graphic items within the
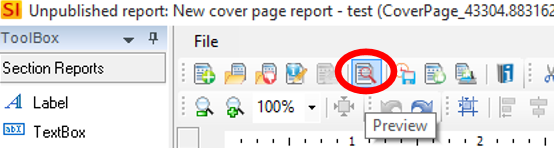
report are “hard coded” and cannot be deleted without breaking the VBA code. To test this,
simply execute a “Preview” after any changes to ensure code integrity.
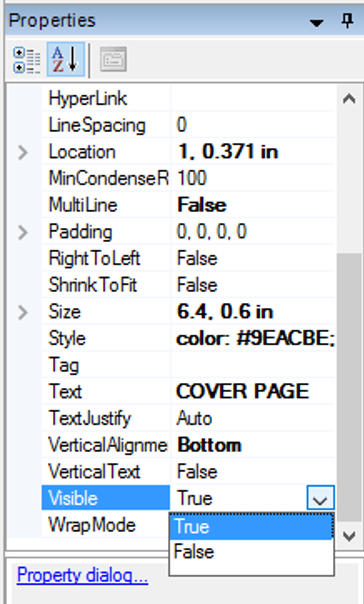
Any items that cannot be deleted, can have their “Visible” status changed from “True” to
“False” in the Properties section in the bottom right corner of the Report Designer:
Making Changes
With these thoughts in mind, let’s make some changes to the layout…below here is the top
portion of the cover page:
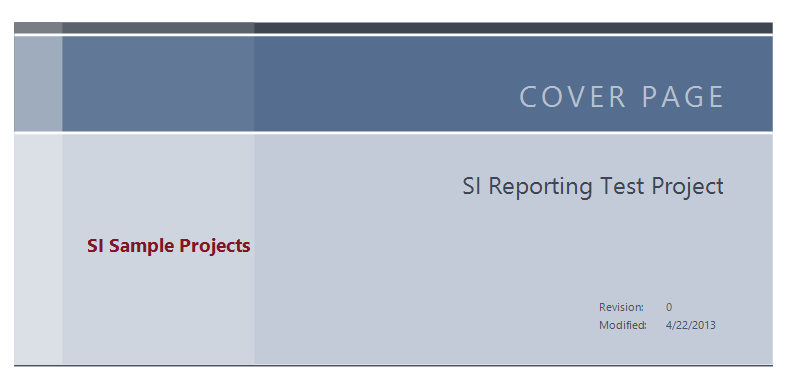
With a few simple adjustments to the Properties of the text and graphics boxes, I now have
this…
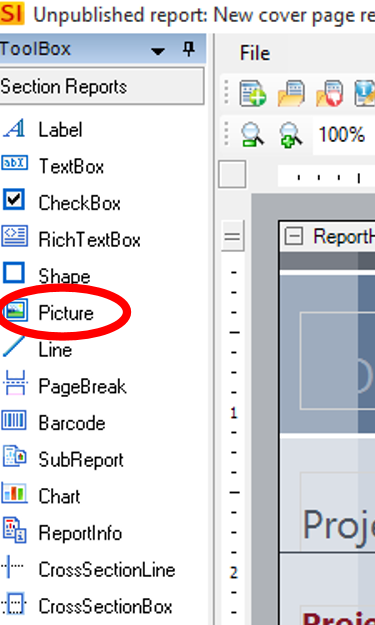
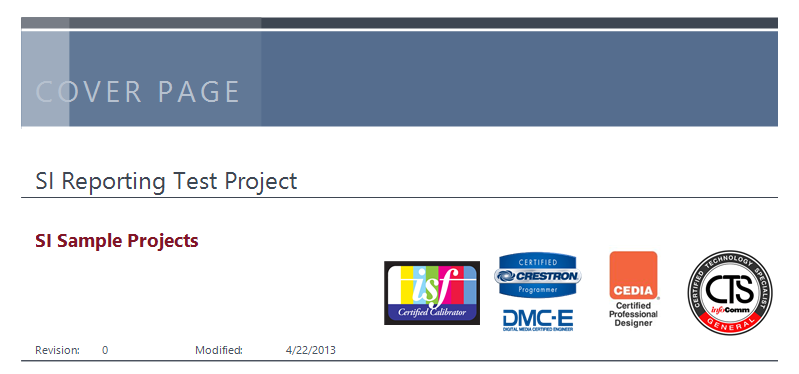
I also added a line under the Project Name. Next, I’ll add Picture Boxes to insert some industry certifications. This option is in the upper left corner of the Report Designer and is called the “Toolbox”. Simply drag an option over to the drawing page and populate the details.
After a few clicks to insert certification images, I now have these items included on my cover page:
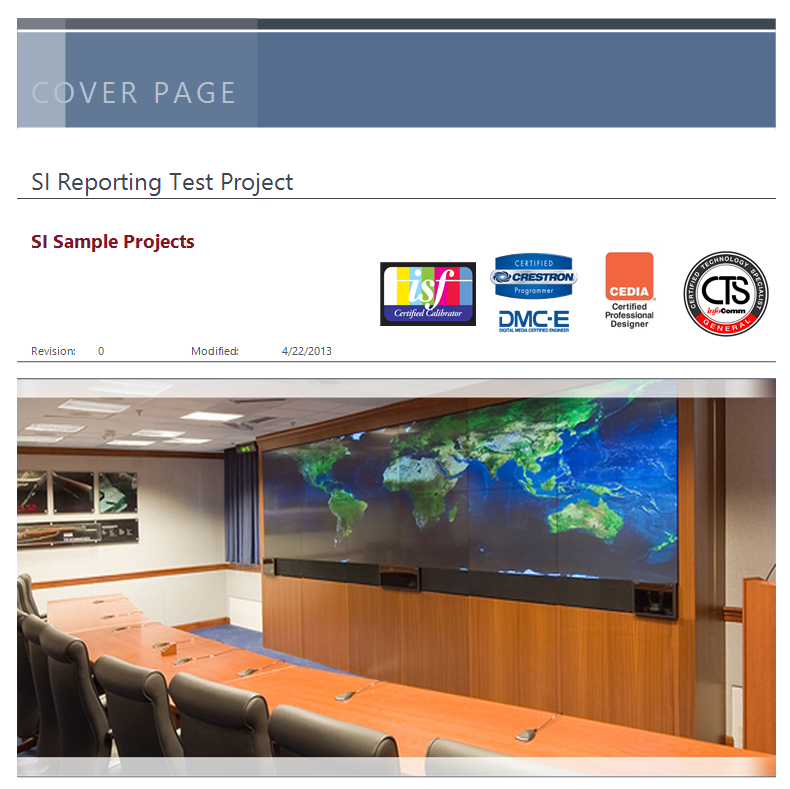
Next, let’s change that cover page image to something more appropriate for my client base.
Again, I’ll use a Picture Box to add a new image and simply change the status of the existing
one to “Visible – False” in the “Properties” section.
And here is the result: (use the Preview option to generate “in-progress” results.)
Next, let’s spruce up that bottom section and footer. First, I’ll move the company logo box that
pulls from the Company Information section of the SI configuration in your Control Panel menu
up to the top row as a “branding” icon…

and insert another Picture Box for further presentation of company information in the lower
section of the report resulting in this:
I also set the status of the footer color box to “Visible – False” and recreated a “mirror” image of
the top color bars for an “inverse” effect on the overall look of the cover page. So now our
preview image of the cover page looks like this:

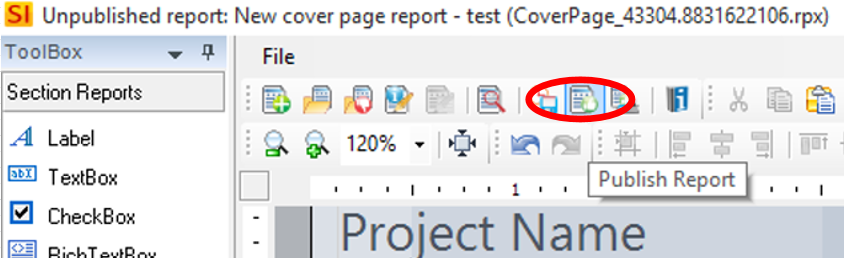
Now that the report has been customized, we need to “Publish” out to the software for testing
beyond the preview data.
This is accomplished by clicking the “Publish” icon in the top row of executables in the Report Designer:

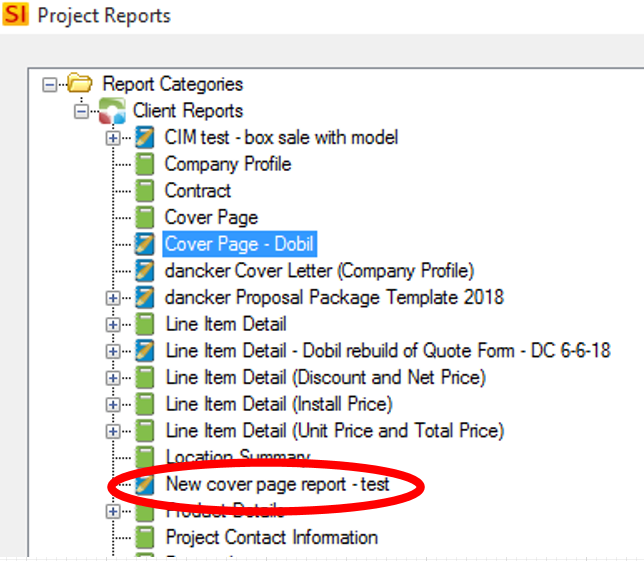
The new Cover Page Report is now active in your Report Explorer…
as well as in your Projects:
And now, the end result is something like this:
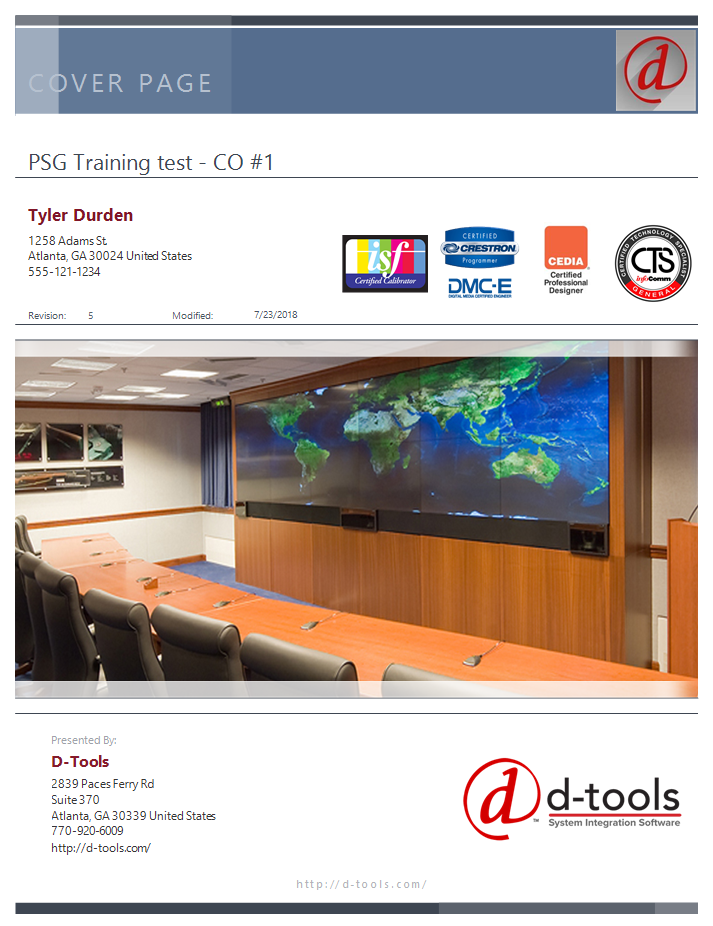
Just like that, you’ve completed your first “customized” report within the SI Report Designer in SI 2018.
And all with absolutely “zero” coding and minimal configuration of settings and features.
Hopefully, this will enable your team to take a few steps towards branding and making your report documents your own. So, when you do find your quote on a stack of proposals on a client’s desk, your offering will have best opportunity to succeed by having the desired look necessary to communicate your team’s overall professionalism and commitment to customer satisfaction.
And this is where D-Tools and its feature set comes in extremely handy. By providing you a way to customize the output of our software, we offer you the ability to still leverage and harness the data-rich product set while at the same time giving you an avenue to emphasize your firm’s unique place in the market.