


The Procurement Phase initiates once the products have been selected and the project has been approved. Unfortunately, changes happen, and if the project has a long-life span, and/or items becomes obsolete before they are purchased, changes to your project items will occur. D-Tools handles revisions and change orders very well, and I would like to review the best practices for procurement management in D-Tools while handling changes and Generic Items.
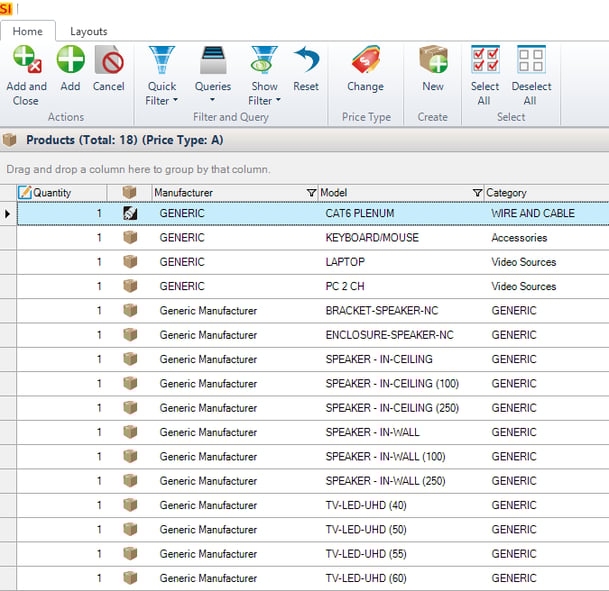
Generic Items are used as a place-holder of an actual product that has not been defined yet. An example include TV’s, cables, and accessory items. If you do not have Generic Items on your database, a simple way to create multiple Generic Items (quickly) is by using the Clone function. For example, if you would like to create a series of Displays, one for each popular size (as shown below), we recommend using the Clone feature (as explained in detail on the link) and then change the model, description and price for each cloned item. Feel free to create variations of Generic Items to include different specifications and price points.
What happens when your customer accepts a proposal with a Generic Items? Or what if some items in your project needs to be replaced by any other product? What and how you will manage the procurement in D-Tools?
The following suggestions applies to both scenarios, as the abstraction and the steps to resolve is exactly the same. Let’s walk through the process.
1. Add a Generic Item to a project. If the item does not exist on your SI Database, you can add it on-the-fly. If you have Generic Items in QuickBooks, you can map to those items during the “Create Estimate” from this particular project or Change Order
Here is an example of Generic Items in the database:
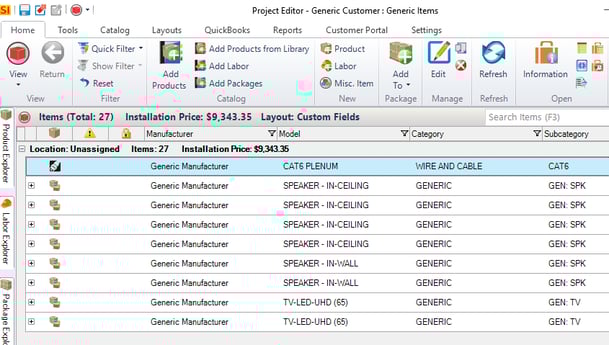
Here is an example of Generic Products in a Project
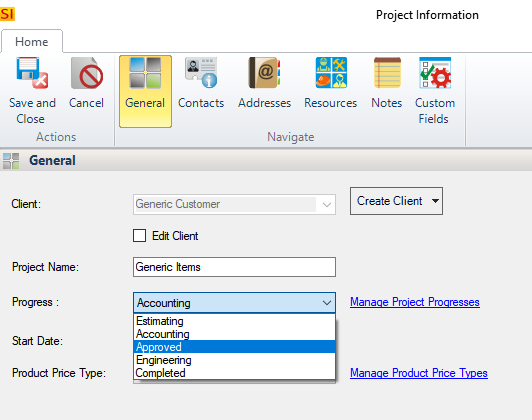
2. Once the project is approved by your customer, and you are ready to send the (first) invoice, create a QuickBooks Estimate. Click here for details on creating a QuickBooks estimate
Here is an example on how you can “flag” a project as Approved
3. Before creating a Purchase Order (or when any other changes may occur), you will need to define the correct Manufacturer and Model that will replace the Generic Item(s). We recommend using the following features on this specific order:
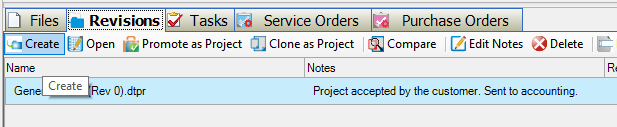
A. Create a revision: This is the first step and a “must” so the changes can be tracked, pushed and reflected on your QuickBooks estimates and invoice, to include inventory numbers. Click here for details about creating a revision.
Here is an example of creating a revision and making the notes to reflect the revision.
B. Replace: Once a revision has been created, please go back to your project (Project Editor Window) and use The Replace function. This feature automatically deletes the item from your project while adding a replacement part. It also provides additional control such as maintain installation price, accessories, and more, which you may want to consider so the price of the project, and related accounting numbers will not change. Click here for details about using the Replace Feature.
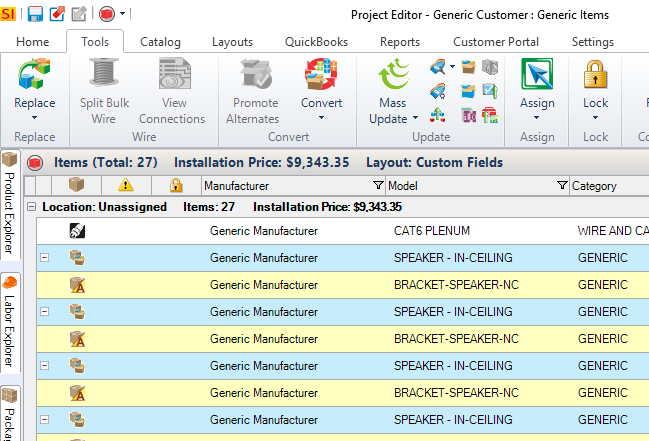
Here is an example of using the “Replace” feature:
I selected the 4 Generic Speakers on the project (highlighted in Blue – not to be confused with the yellow items as they are accessories for those speakers).
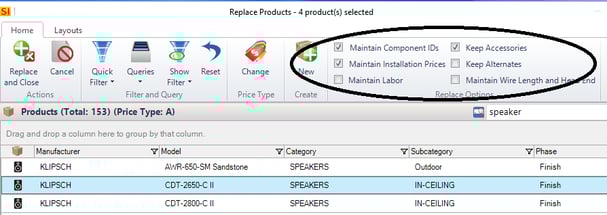
Then, I clicked on “Replace” and selected the speaker of my choice. Notice I am maintaining the following by checking the appropriate check boxes, as shown below:
- Same Component ID
- Same Installation price
- Keep accessories
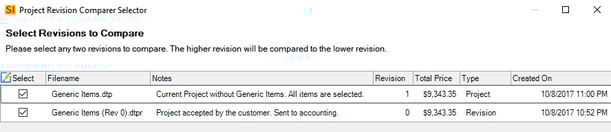
C. Compare Revisions: The compare revisions provides complete visibility on what has changed. There you can make further changes such as “rejecting” the revision, which reverts the project to its original state. Click here for details about comparing revisions.
On the example below, the price has been maintained, and proper notes were added to reflect what has changed on the project and revision.
D. Change Order Report: While this is an optional step, you may run a change order report and provide your customer a detailed report on what has changed.
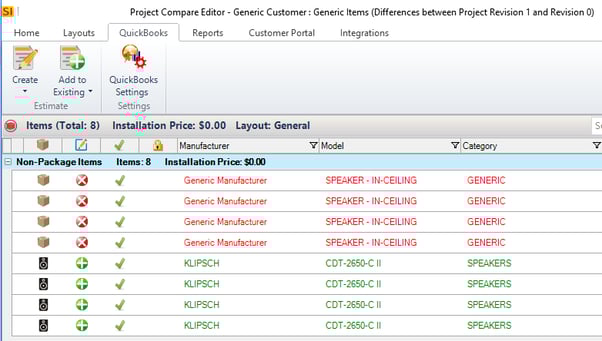
E. Change Order to QuickBooks -> Create / Update to Existing QuickBooks Estimate: Here you can either create a new estimate (only works for positive “change orders”) or add to an existing (recommended unless that specific estimate is no longer available for changes). By applying those changes to the estimate, your parts quantities and invoices will follow the changes noted on the change order, and there will be a perfect match all around. Click here for details about pushing a Change Order to QuickBooks.
On the following example, the changes appear with the items removed and added (through the replace function). This can be “pushed” into QuickBooks with a click of a button.
Once the changes have been applied, and both your project and the QuickBooks estimate/invoice reflects the correct items, there will not be any discrepancies on your procurement management.
If you have any questions about this process, please open a support ticket by clicking here and our support team will assist you right away.
