
Another area of inquiry, per my attendance at last month’s InfoComm, was about the Purchase Order process within SI and how best to “trigger’ this phase as means to get a recently acquired project started.
While different for each team, it does seem that one of the initial steps in getting projects launched or booked on the calendar for installation completion is the commencement of the procurement phase. This is typically handled by a team member other than those in the sales position – but not always.
Because of that, I think the operational aspect of this process in SI is best presented when starting from a point that could be executed by either a member of the sales team or by the next team member(s) in the project implementation “chain”.
So, if you’re interested in learning more about this process…please keep reading!
Purchase Order Request
Once you’ve “won” your deal and the “opportunity” is now a Project, you may want to make an update to the items listed in your design solution so that the procurement phase can begin.
Updating Order Status
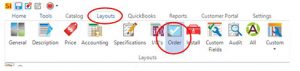
First, open your Project and select your appropriate Layout so you can view the Order Status Column. SI does have an Order preset Layout, but you may want to create your own Custom Layout to see the appropriate or necessary data columns to help you with your view of the data fields related to Procurement and Purchase Orders.
From here, highlight all items in the Project and right-click to select Update & Order Status:
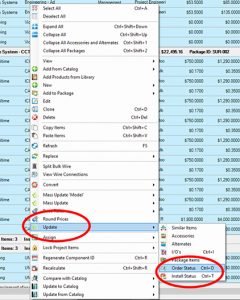
Next, select Order Status and then the appropriate designation from your drop-down list:
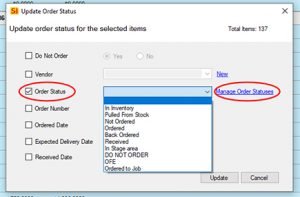
(Note: If the designation you seek is not available, just click on Manage Order Status to create it.)
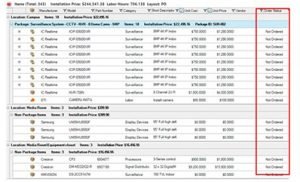
Now your items will show your selected designation…
and you can notify other team members via 1 of 2 methods:
1) Change the Project Status and an appropriate Workflow Rule will handle this
or (For more info on Workflow Rules, see my prior TOM)
2) Run a Purchase Order Request with Status report and share that.
If you choose to run a POR with Status report, you could end up with something like this:
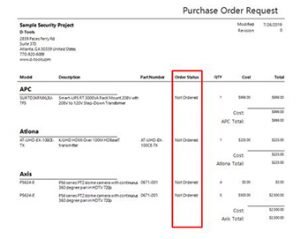
Now your team is ready to begin the actual Purchase Oder process within SI.
Purchase Orders
With the status of items now set in the Project, you can now go about creating the Purchase Order in SI and submitting that out to your Vendor.
Let’s first start by creating a PO either from the Project Explorer…
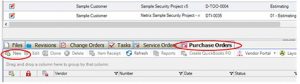
or from the Purchase Order Explorer.
![]()
Upon clicking “New”, this screen will appear:
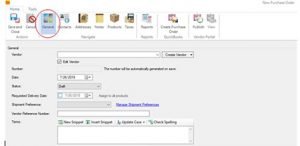
From here you can fill in the details of the General tab which will enable you to select the following data fields: Vendor, Date, Status, Requested Delivery Date, Shipment Preference, Vendor Reference Number and Terms.
Next, you’ll need to make sure the appropriate contact is populated on the Contact tab:
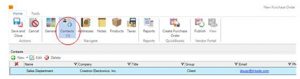
If this is already populated in the Vendor details within the Contacts section of SI, then the contact will load automatically.
You can then verify the correct PO addresses for the Vendor and Project site:
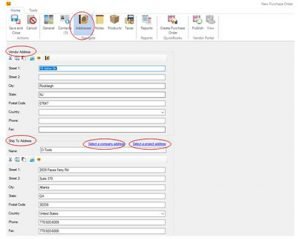
If need be, you can modify any of the Project delivery address details and even select a different Company address in case your team has multiple offices or a separate warehouse location.
For entries that merit it, there is a Notes field as well for any pertinent data (Not shown).
And now for the big enchilada…you can add Products to the PO!
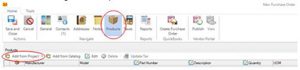
Select Add From Project populate your Product list from the Project.
Then, simply highlight the items you wish to add to the PO and click Add and Close:
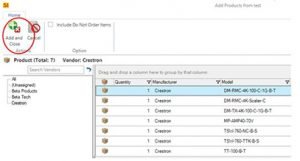
You’ll then see this…
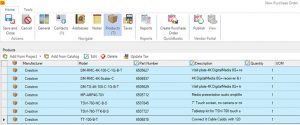
From here, you can run PO Reports, send the PO to QuickBooks (if applicable), publish it directly to your Vendor via the Vendor Portal,
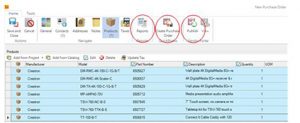
or use your Outlook to send a PDF version of the PO via email from the Project Explorer. Just remember to click Save and Close in order to exit the actual PO.
Going forward, you can now update any of the data fields listed below here in the Project automatically via this process.
![]()
Any data changes to these fields in the PO (including cost) will be prompted for updating the
next time the Project is Checked-out and opened:
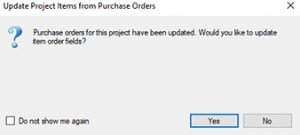
By clicking Yes, you’ll next see this screen that provides a list of the items to be updated:
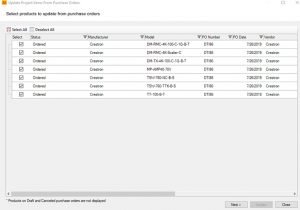
Upon clicking Next, you’ll see all the available fields for selection:
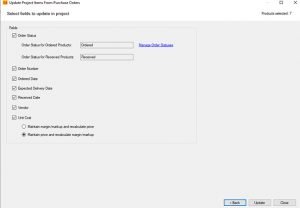
Simply select or deselect any of the appropriate fields and click Update when done.
You’ll then be able to see the data land in the appropriate fields within the Project via the Order layout or your custom layout.

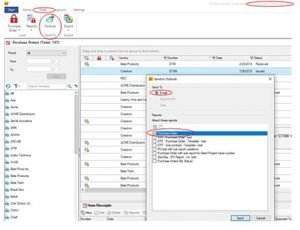
You can now export your layout for data processing in Excel (or another destination software via CSV importation).
![]()
Or you can run any appropriate Reports (including the PO Request shown below here) to share or review any of the pertinent data.

And just like that, you’ve completed your Purchase Order process within SI.
Hopefully this will enable your team to enhance your internal purchase order process.
In closing…
For more information on these and other features of SI, please see this link: D-Tools SI.
You can also get more detailed information about SI v12 via our upcoming webinars or by enrolling in SI training with our PSG team.
And don’t forget, that’s why we’re here…to ensure your success with our product! Be sure to check back here next month for more on v12.